
Tech Tip: Positioning of objects in the footer of a List form
PRODUCT: 4D | VERSION: 2004 | PLATFORM: Mac & Win
Published On: April 3, 2007
In 4D 2004.x, the bottom and right edges of windows have become “pusher” (or Side Pusher) splitters by default. This means that objects located to the right or below the limits of a window displayed on screen are automatically pushed to the right or bottom when the window is enlarged.
Furthermore, list forms now have a horizontal scroll bar which lets you scroll through a form width-wise, but only header, detail and break areas can be scrolled. Footer areas, on the other hand, remain fixed and cannot be scrolled, which leads to the current problem with objects located in a footer (see picture below).
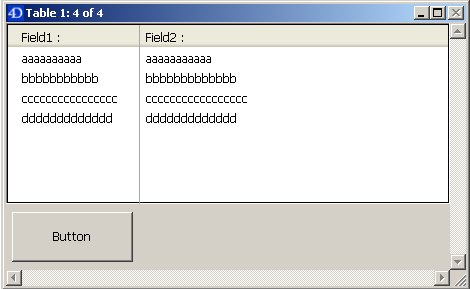
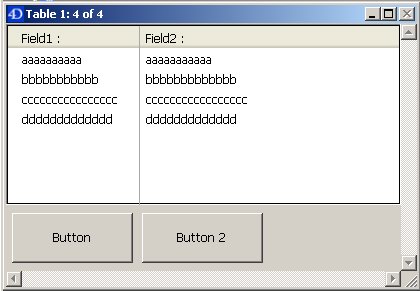
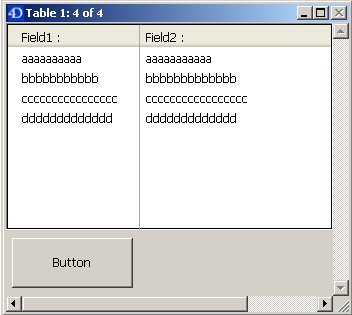
Before Resizing:
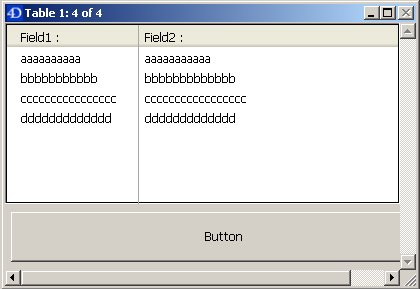
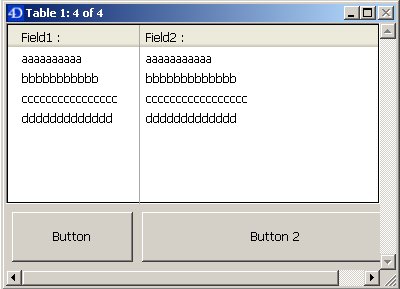
After resizing:
Problem:
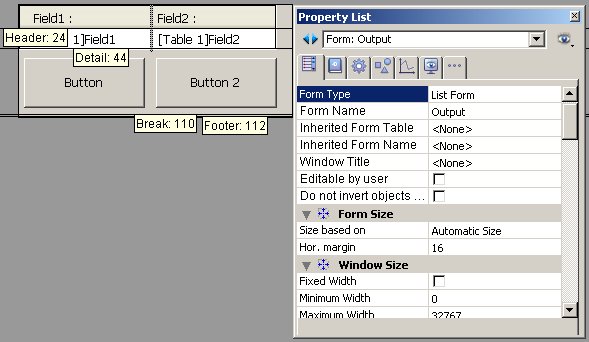
The object(s) (in the example two buttons, Button & Button 2) are located in the footer. The window has 0 as minimum width and the button does not have any horizontal sizing properties set. When the form is resized in width two different cases can occur:
Case 1: We reduce the size of the form until part of button 2 is covered. If we then enlarge the form, the button is resized as well.
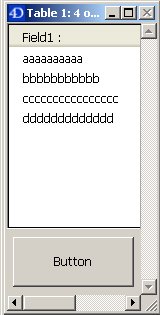
Case 2: We reduce the size of the form until button 2 is completely covered. If we enlarge the form, button 2 is then pushed outside of the window and is therefore no longer visible.
Both cases are caused by the Side Pusher effect.
Solutions:
Several solutions are possible in order to avoid the problem.
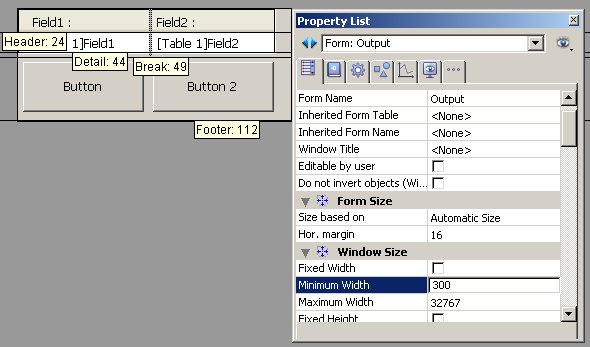
Solution 1:
Leave the button in the footer but set a minimum width for the form. In the example below, the minimum width is 300. Then when the window is resized, there will be a stop that will prevent overlapping.
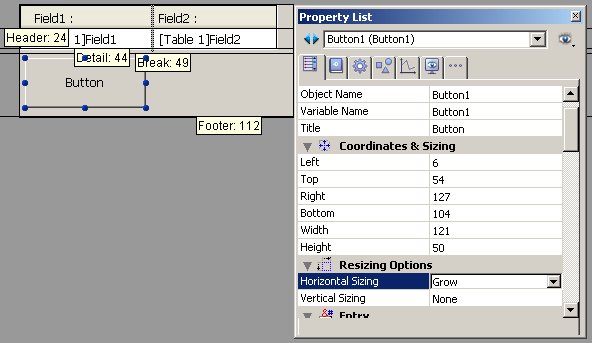
Solution 2:
Another solution, with the button still remaining in the footer, is to apply a horizontal resizing property to the object, while leaving the minimum width at zero. This is illustrated in the picture below.
Solution 3:
The last solution is to put the object in the form break area. In this case, the minimum width is zero and there is no horizontal resizing property set. See the picture below.
Result:
After application of the different solutions the results will be similar in that the object will no longer grow with the window if resizing and overlap problems occur.
Furthermore, list forms now have a horizontal scroll bar which lets you scroll through a form width-wise, but only header, detail and break areas can be scrolled. Footer areas, on the other hand, remain fixed and cannot be scrolled, which leads to the current problem with objects located in a footer (see picture below).
Before Resizing:
After resizing:
Problem:
The object(s) (in the example two buttons, Button & Button 2) are located in the footer. The window has 0 as minimum width and the button does not have any horizontal sizing properties set. When the form is resized in width two different cases can occur:
Case 1: We reduce the size of the form until part of button 2 is covered. If we then enlarge the form, the button is resized as well.
| Before Resizing | After Resizing |
 |  |
Case 2: We reduce the size of the form until button 2 is completely covered. If we enlarge the form, button 2 is then pushed outside of the window and is therefore no longer visible.
| Before Resizing | After Resizing |
 |  |
Both cases are caused by the Side Pusher effect.
Solutions:
Several solutions are possible in order to avoid the problem.
Solution 1:
Leave the button in the footer but set a minimum width for the form. In the example below, the minimum width is 300. Then when the window is resized, there will be a stop that will prevent overlapping.
Solution 2:
Another solution, with the button still remaining in the footer, is to apply a horizontal resizing property to the object, while leaving the minimum width at zero. This is illustrated in the picture below.
Solution 3:
The last solution is to put the object in the form break area. In this case, the minimum width is zero and there is no horizontal resizing property set. See the picture below.
Result:
After application of the different solutions the results will be similar in that the object will no longer grow with the window if resizing and overlap problems occur.