
Tech Tip: How to Modify Column positions on a Quick Report
PRODUCT: 4D | VERSION: 14.3 | PLATFORM: Mac & Win
Published On: January 30, 2015
For aesthetically purposes, it is possible to modify the positions of columns on a Quick Report. To do so add in empty columns to act as the white space to space out the columns. Then for the empty columns set the style to None and remove all of the boarders.
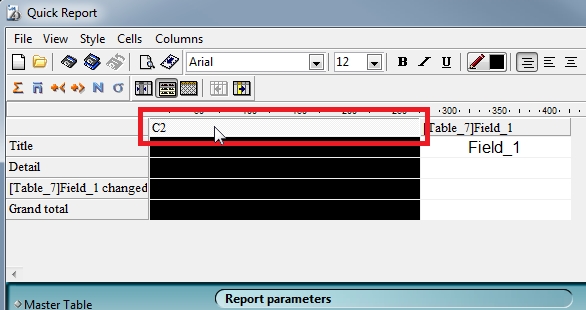
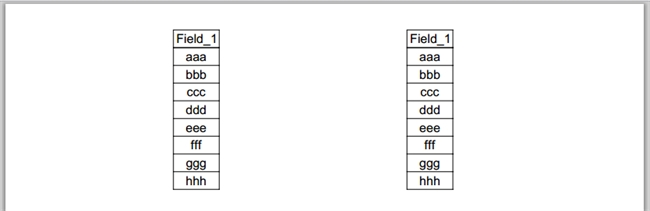
For example, to center a column, add the column an empty column to the left and re-size it as desired:

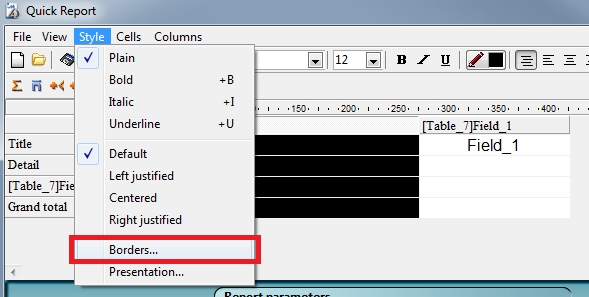
Then to apply the styling, select the entire column. This can easily be done by clicking on the header of the column and will highlight the entire column:
Then access the Border styling properties by using the menu:
Alternatively contextually clicking (right clicking) on the header will automatically select the column and bring up a context menu where the Border properties can be accessed:

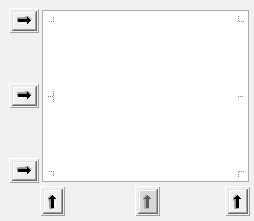
Next remove the borders by clicking the button shown in the red box below. Alternatively, removing the desired border lines can be done by selecting none and clicking the buttons to apply the changes to as shown by the red circles:

This will remove the border lines as displayed in the example box of the window:
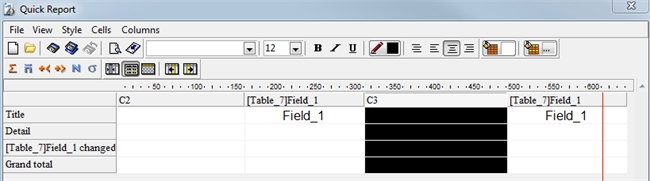
Accept and apply the changes by clicking the OK button. Then the document is ready, example of the output is shown below with a single column centered.

Other positional modifications can be done such as the following example:
Using this technique, it is possible to modify the column positions on a quick report so that it can be positioned in a more desirable location on the document.
For example, to center a column, add the column an empty column to the left and re-size it as desired:
Then to apply the styling, select the entire column. This can easily be done by clicking on the header of the column and will highlight the entire column:
Then access the Border styling properties by using the menu:
Alternatively contextually clicking (right clicking) on the header will automatically select the column and bring up a context menu where the Border properties can be accessed:
Next remove the borders by clicking the button shown in the red box below. Alternatively, removing the desired border lines can be done by selecting none and clicking the buttons to apply the changes to as shown by the red circles:
This will remove the border lines as displayed in the example box of the window:
Accept and apply the changes by clicking the OK button. Then the document is ready, example of the output is shown below with a single column centered.
Other positional modifications can be done such as the following example:
Using this technique, it is possible to modify the column positions on a quick report so that it can be positioned in a more desirable location on the document.